It's hard to think of an easier way to make a moment feel extra special than by simply lighting a candle. The soft, comforting glow is the perfect way to set a mood of calm and warmth before a meal or bedtime story, and children are always fascinated by this tiny flame dancing before them. The process of making candles themselves is equally fascinating and can become a fun seasonal family tradition.

You will need a few basic supplies to get started (probably already in your kitchen). First, an old cooking pot for melting the wax. We found one at a thrift store for a few dollars and this has become our designated beeswax pot. I highly recommend not using a pot you love, because although the wax can be picked, scraped or melted off, it's sort of a pain and I'm all about making things easy with clean up! You will also need a spoon of some sort – again, I would recommend something that is not precious. A few glass or metal jars, one for filling with melted wax and one for water. Do not use plastic of any kind, as the wax will be very hot! Lastly you will need some 100% pure beeswax and cotton wicks. You can find these in our shop here, and I have also seen various forms of beeswax for melting in natural food stores.

Let's begin! First, pour the beeswax chips into a pan set to about medium. You may need to raise the heat if it seems to be taking a long time, but I would not raise it above a medium-high setting. If you use the bag of chips from our shop, we used up about 3/4 of the bag to make enough to fill a medium size glass jar. A larger mason jar could probably hold the entire bag once melted. Remember, the deeper the can, the longer your candles can be. Help your child to gently stir the beeswax around in the pot and watch as it turns from a golden yellow to a deep amber color – it's beautiful!

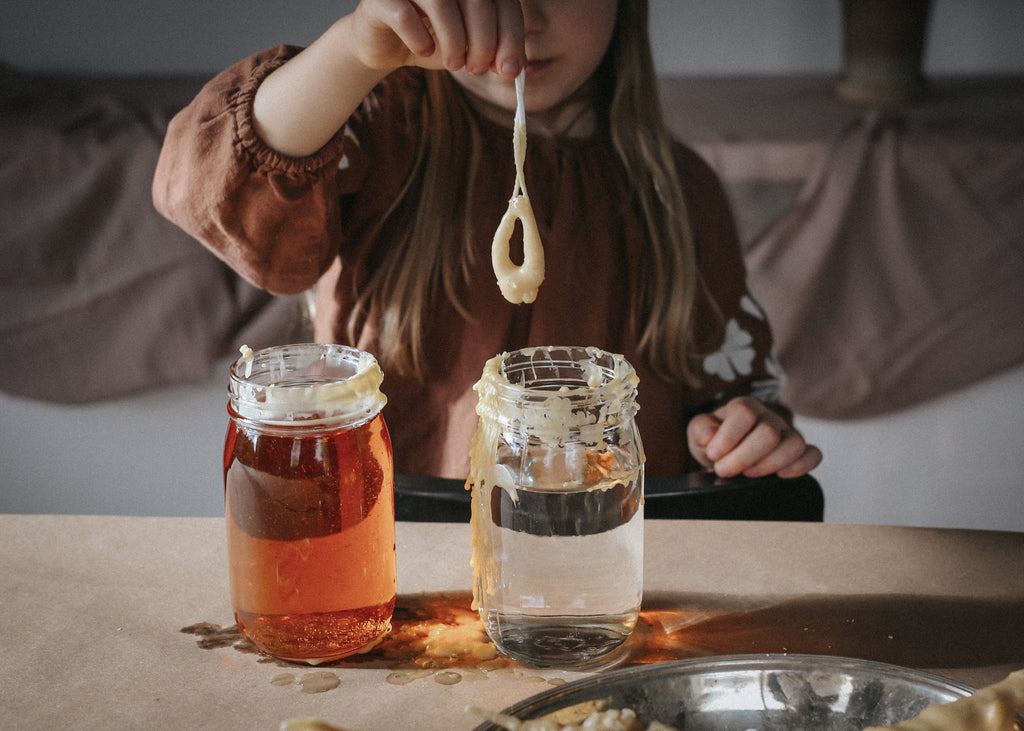
Next, carefully pour the melted wax into your glass jar or metal can. Fill a separate jar or can with cold water. Cut a strip of cotton wick to about twice the size of the height of the jar or can. You can tie a metal nut or washer to the end which can help to keep your candle nice and straight, or you can freestyle it like we did and just start dipping, occasionally using our fingers to straighten things out a bit in the beginning stages.

Start dipping your wick slowly between the melted wax and the water and watch your candle start to thicken. You can make it as thick as you wish, but make sure it won't be too thick to pull in and out of the jars! When it is as big as you want it, set it on a hard surface to cool. We like our candles pretty wonky looking, and if you do too, you will want to press the end of the candle after a few minutes against a hard surface to create a flat bottom and ensure it can stand on its own. I'm pretty sure all of ours got so big they would never fit inside any kind of candle holder!


Another fun idea is to use things from nature to make your candle. This does require more adult help, but things like empty walnut or chestnut shells are perfect for this! They make very cute tiny candles that will burn for about 30 minutes or less, and it's especially fun to put them in a bowl of water and enjoy the floating lights.